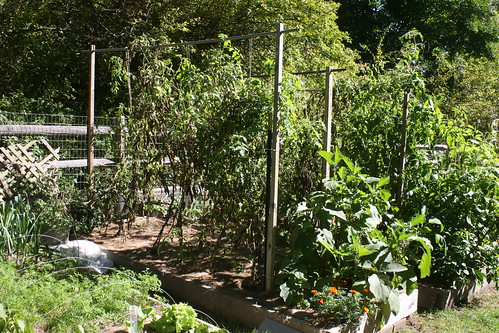

The season is fading and I can see my garden structures again. My husband designed these tomato supports for me and I've used then probably 10 years now. I used to make tepees out of 10-ft 1x1 inch poles. That worked OK, but poles and string are less work, support the vines better, and give better air flow. Here's what I do to set up and use pole and string tomato supports.
Side support materials:
Two 5-ft metal fence poles
Two 8-ft wood posts, 2x3 in, with a hole in the top that fits the cross pole that will be used
Post driver
Zip ties
Cross pole:
One 10-ft metal pipe (copper or galvanized)
Tomato support materials:
Twine and scissors
Setting up the supports:
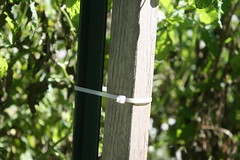
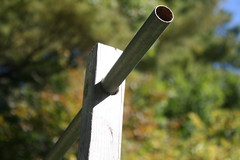
First, I firmly pound the fence poles into the soil using the post driver. I place them about 9-ft from each other, so the metal cross pole will be well supported and there will be a bit of overhang. Then to each fence pole I attach the wood post with the hole in the top making sure that the holes are set up so the pole can go through them. I used to attach them with screws and bolts, but I've gotten lazy and just use zip ties now. Once the end posts are up and are very solid in the ground, I run the long metal pipe through the holes at the top.
Supporting a tomato vine:
Space plants about 12 inches apart. I usually plant 5 tomato plants below each 10-ft pole. Lay out and plant the seedlings with even spacing. While they are still small seedlings, I usually support the plants by tying them to small sticks. When the plants are about 1-2 ft high, I tie them to the top pole. To do this: I run out enough twine to go from the ground, up and over the pole, and then down to the ground again. Add some extra. I spiral the two pieces of twine around the plant down to it's base then tie it to the stem. To tie it, I choose a sturdy location of the stem, preferably below the lowest leaf. Tie a bow knot in the two strands of twine to hold them together. Then use the two ends to wrap around the tomato stem a few times and secure them with a double knot. That's it. Repeat this for all of the plants.
Caring for the vines:
For plants on pole supports, it's best to pick off suckers so the vines stay tall and don't grow into adjacent plants. I gradually remove the bottom leaves as they turn yellow. This gives the plants more airflow. It's best to water from below and keep water off the leaves to reduce the spread of fungal diseases. As the vines grow, wind them with the string. Check on the tie at the bottom of the plant. If it becomes constricting, replace it with a looser knot. Sometimes a second string is need for extra support of the vine if you have a particularly heavy crop of fruit.


Interesting supports, so as the plants grow, you simply keep spiraling them around the string? I like that this looks much easier to store than the concrete reinforcing wire cages I currently use. And it's not so big that I couldn't handle myself.
ReplyDeleteI'm curious how difficult it is to achieve proper rotation among your beds using this method. Do you take the whole apparatus out of your bed(s) each winter and then start over the next year in a different bed, driving in the metal posts and setting up the wooden posts and pole again? Looks from your picture like you get two of these per 4'-wide bed?
ReplyDeleteYes, I just spiral the vines and strings as they grow. Wire cages are pretty easy to use too. I'm not sure what concrete reinforcing is. With wire cages the plants don't get as much air circulation as training them up a string. And big plants don't fit in cages very well. I don't know why my tomatoes plants get so big. When I use cages they spill over the top by mid season. My mom's tomatoes do fine in cages. Anyway, yes, the poles are easy to store. I usually just lie them down in a garden path and leave them out over the winter. I have a new shed this year, so maybe Ill put them in there this winter.
ReplyDeleteAl, yes, I remove the apparatus every fall and reassemble in the spring. It comes down pretty easily. I cut the plants and strings down, pull out the metal cross pole, cut the zip ties, then pull out the metal posts. I put it up again the next year in a different location I follow at least a three year rotation schedule.
ReplyDeleteYes, can fit two rows in one four foot bed, but they are pretty close. I wouldn't do two beds like that next to each other. I put one row in the adjacent beds. This year we had no problem with fungal diseases so they were fine. I did the same last year.
Thanks. I've had a lot of fungal problems in the past few years (perhaps from caging the tomatoes), and may just try your method next year.
ReplyDeleteCongrats on getting your new dog Charley - we have a Charlie in our family as well, although he is a hound mix.